What do you enjoy most about doing Travel Photography? What first got you into Travel Photography? Burning questions, right? For us, we love the memories, capturing those moments, and learning how to get the most out of our cameras. We’ve been working hard on this blog and we thought we’d share a bit on our thoughts to these questions.
Showing posts with label Photography. Show all posts
Showing posts with label Photography. Show all posts
Thursday, 3 November 2016
Travel Photography Vlog

Sunday, 16 October 2016
Jumping into Japan
 |
| Sapporo, Japan |
- One will never be bored of Japan
- Have you seen, smelt, and tasted the food there? Amazing!
- The culture, history, architecture, and so much more make Japan such a photogenic place for a photographer to be in
- I love Japan
Japan is a country which I will never ever tire of. Seriously. The abundance of delicious food will always make a person like me crave the place over and over again. However, there are also the shrines with its calming and spiritual auras against the busy, lighted up streets of the cities which can make a photographer have much to capture whilst in the country. There are just so many photo opportunities the country provides.
The photo above was taken in Sapporo (札幌) at the Sapporo Beer Museum. It houses 'Sapporo Beer', one of the most popular and oldest beer brands in Japan. As I was in Sapporo during the snow season, my camera settings had to accomodate to the difference in lighting. When capturing photos, increase the exposure compensation on the camera - it can add to the textures and stop the photo from looking grey. Also make sure to stay warm and wear comfortable clothing as capturing photos in snow is only fun when you're comfortable! Japan is truly a place for people who seek out to explore a different culture, understand the history, try scrumptious food or see spectacular views - what more could a photographer want?!
Author: Lisbeth Wong
Saturday, 8 October 2016
Moments in Malaysia
 |
| Batu Caves, Malaysia |
I travelled to Malaysia in February this year for the first time in my life. I had always wanted to go after befriending numerous Malaysian friends at the beginning of my university career. They were constantly hyping up the scrumptious food choices (and the cheapness of it) they had back in Malaysia and with that, it was one of my main reasons to go. However, once I got to the country itself, I realised it was much more than (truly delicious) Malaysian food; the culture, the attractions, the history and much more makes the country a truly fascinating place.
The photo above was taken at the Batu Caves in Selangor. When I reached the site, I was amazed by the sheer magnificence of it and quickly snapped a photo from afar just to emphasise the size. It is a limestone outcrop which features three caves with Hindu temples and shrines. There are monkeys which frolic around the steep 272 steps and in the caves. Climbing to the top of the steps will provide you with another fantastic opportunity to take photos of the stunning skyline of the city centre, Kuala Lumpur.
For more inspiration on photography in Malaysia check out this article which illustrates the vibrancy of the country itself - http://www.timeout.com/kuala-lumpur/travel/malaysias-most-photogenic-spots
Author: Lisbeth Wong
Author: Lisbeth Wong
Sunday, 2 October 2016
Photographers Gonda-like it in Venice!
 |
| Venice, Italy |
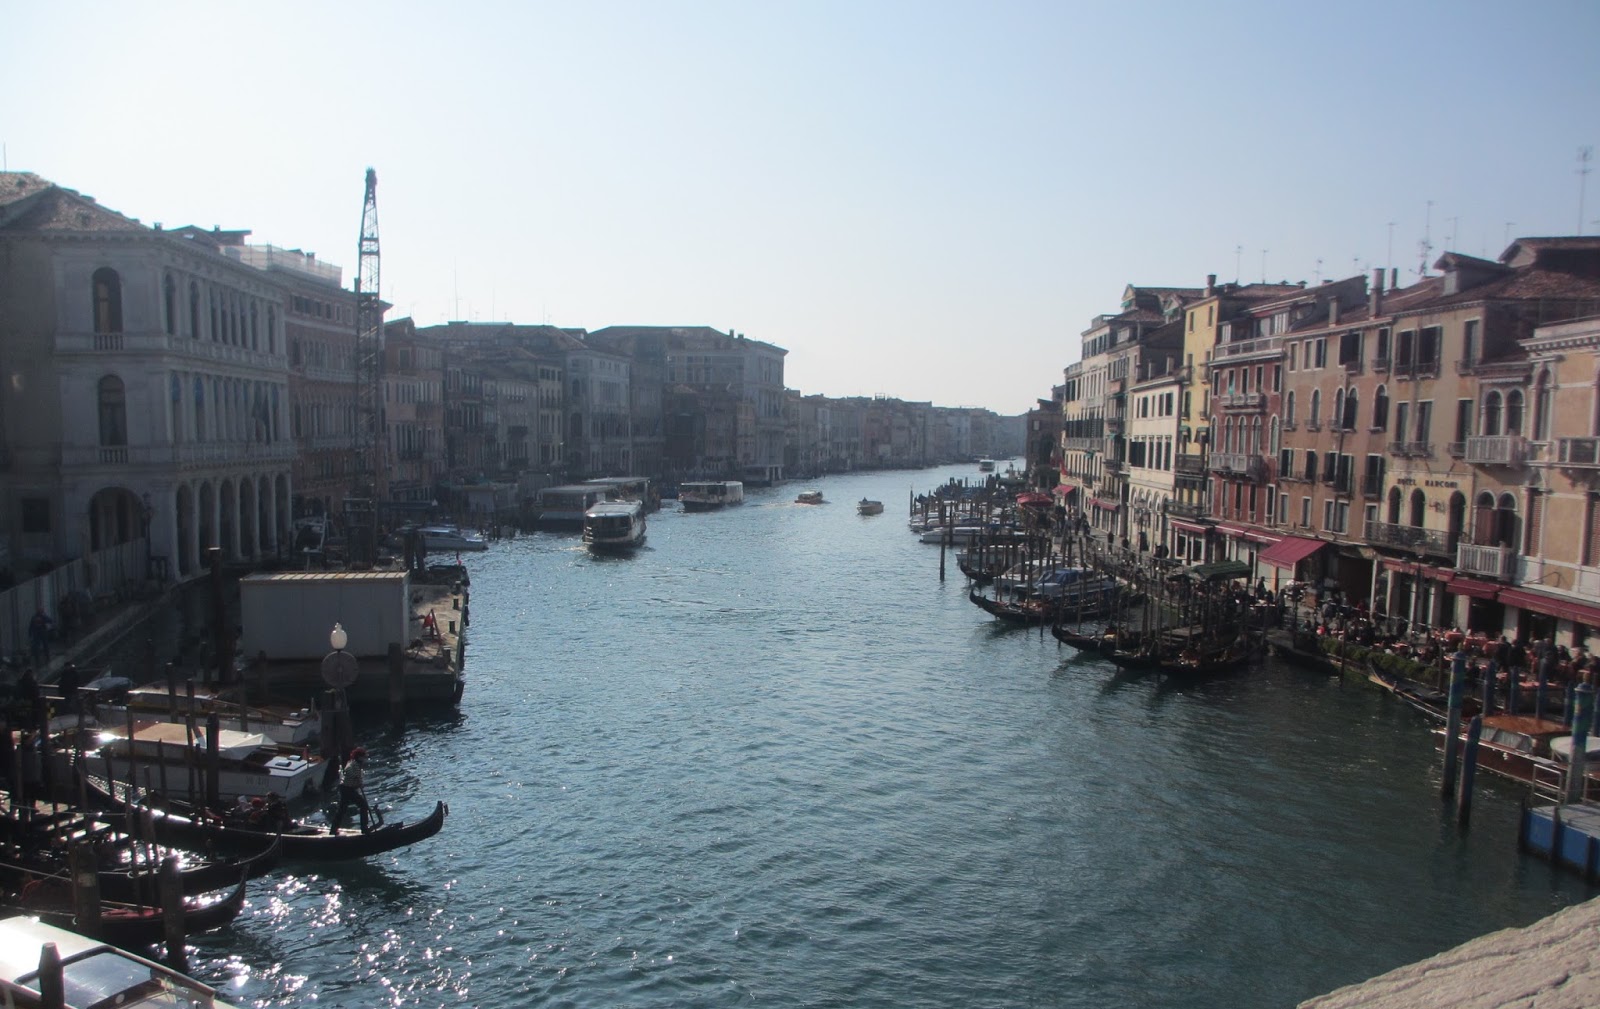
This photo of the Grand Canal was taken from the Rialto Bridge which was completed in 1591. My Canon IXUS 230 was used with:
- Aperture: f/9
- Shutter Speed: 1/500
- ISO200
One thing you must definitely see in Venice is Basilica di San Marco. Unworldly Italian architecture is absolutely a photographer's dream! Otherwise, there are numerous museums to be explored or even getting lost walking around the city and find yourself coming across stores with Venetian souvenirs and antiques (and buy yourself a mask whilst at it). Another way to see the city with a different view is to take a Gondola which will take you around the canals of Venice and bring you to the little-known parts of this beautiful city.
For more explicit inspiration on photography locations in Venice check out The Wandering Lens' blog post on Venice photography: http://www.thewanderinglens.com/venice-edition-photography-location-scout/
Author: Lisbeth Wong
Thursday, 29 September 2016
Simply Stunning Sydney

Sydney is a beautiful location for taking stunning photos. I love the contrasts Sydney offers in terms of textures, shapes and colours. No matter where you are; whether it be in the middle of the city or on the golden sandy beaches there a great photography opportunities waiting just around the corner.
Some of the highlights of photography for me in Sydney so far have been the water ways, bushland, night city and coastal sunset shots. Each have offered an experience where I have learnt a little more about photogralhy.
Because Sydney is where I grew up there have been so many opportunities to explore the city in it's entirity. I reccomend starting off taking photos of iconic landmarks in the city such as The Opera House and The Harbour Bridge and experimenting with shapes and lines as they offer many opportunities to enhance these elements of photographic design.
If you want some more great ideas or information about photographing Sydney check out About Blank Sydney Photography.
Saturday, 24 September 2016
Leaving my heart in Japan
 |
| Traffic in Shinjuku |
Visiting Japan twice in the space of one year was a magical experience that I will never forget. From the moment I arrived, I fell in love with the country, the culture and most of all, the people. Such a genuinely nice population with every single person willing to try and help even if they didn't speak a word of English.
The above photo is one of my all time favourite photos I've ever taken, and it was just on a whim while crossing a pedestrian bridge over the busy night traffic of Shinjuku. Using the manual setting of my DSLR to manipulate a long exposure shot with the right brightness was one of my early self introductions to manual photography. The whole country is so photogenic and I was lucky enough to be there during the cherry blossom season.
The nightlife of Japan was spectacular; all the bright lights, cheap alcohol, quaint little bars and some truly pumping clubs. Japan, Tokyo in particular, is definitely a place I would like to live in at some point in my life. As a self confessed nerd, being in world's capital of technology was just a constant wonder. Being surrounded by retro gaming, next gen gaming, and at the forefront of technical innovation just feels oh so right to me. Other highlights of Japan was walking the streets of Harajuku, experiencing the culture at some shrines and temples and losing myself in Akihabara.
I highly recommend Japan to anyone and everyone! Tourism site of Japan: http://us.jnto.go.jp/
Sunday, 18 September 2016
How to use your DSLR when travelling

So you’ve got your DSLR camera… but what do you do with it? What essentials do you need to know for taking those incredible shots? Look no further.
I believe the best way to learn is on the job – it’s no different for a camera. But you can’t miss the simple ways to get a head start. I’ll be explaining my tips based off my experience with the Canon EOS 700D.
The best way to use a DSLR is manually. Understand the main camera features and play around with each of them. This is often known as the ‘exposure triangle’.
- Shutter speed: This is the amount of time the camera exposes the sensor to light in the scene. A fast shutter speed, e.g. 1/1000, exposes less light in the photo.
- Aperture: How much light enters the shot through your lens. A larger aperture e.g. F3.6 means that, means that more light enters the photo. However when the aperture is larger, the photo is more focused towards the centre and the background is blurred.
- ISO: This is the sensitivity of your camera to light. The higher ISO, e.g. 1600, means more light. However the trade-off is the quality of the image decreases and more noise/grain is in the image.
When playing around with these features, you can see the “metering” on your camera to check if it is exposed correctly.
Recommendations:
- If you want to capture a freeze of a moving object, use a fast shutter speed (1/500 and above). Adjust the other settings accordingly without sacrificing the focus and image quality.
- If you want to blur the background and focus on one particular object, e.g. a particular flower, then use the largest aperture (lowest number) to do this. F1.8-3.6 should suffice for this effect.
- If you want to put more light in the photo without having to use flash, then increase the ISO to about 1600. This is ideal for dark lighting situations, however be wary of the noise in the photo.
You can’t learn how to use a DSLR overnight, but go to different locations and take photos and test out different combinations of the features until you get the hang of it. For a virtual way to practice, check out this link from Canon: http://www.canonoutsideofauto.ca/play/
Enjoy! Stay tuned for more travel photography.
Author: Amit Balakrishnan
Subscribe to:
Posts (Atom)